How to Sew a Jelly Roll Rug (Beginner-Friendly, Step by Step)
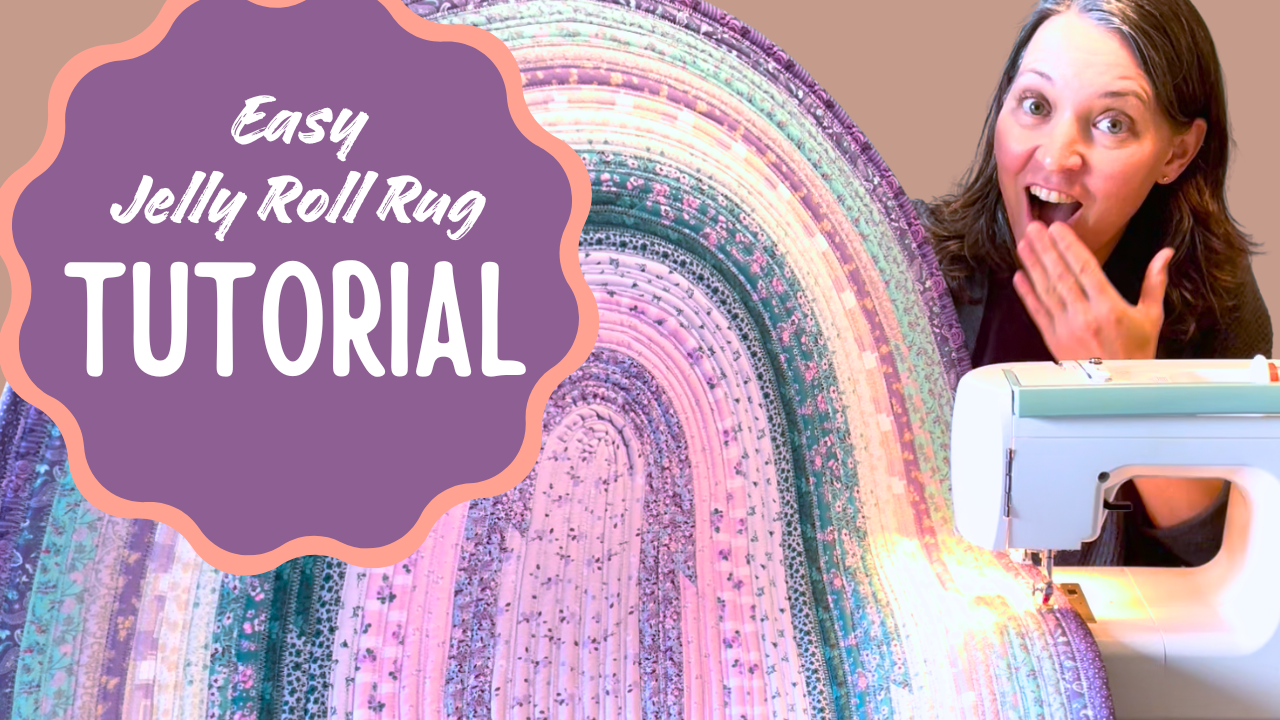
If you’ve been wanting to make a jelly roll rug but feel overwhelmed by all the steps, supplies, and conflicting advice online… you’re in the right place!
I get it. When I made my first jelly roll rug, I had so many questions.
Which batting should I use?
Do I need fancy tools?
What stitch works best?
How do I stop the rug from the dreaded wavy ripple?
Why does it look so complicated?
The good news? Making a jelly roll rug doesn’t have to be complicated.
In this beginner-friendly tutorial, I’ll walk you through the simple, no-fuss method I use to make jelly roll rugs without fancy equipment or unnecessary frustration.
If you’re a beginner who just wants to get your rug done and end up with something beautiful you’re proud of, this tutorial is for you.
Watch the Full Video Tutorial
Or keep reading below for the step-by-step guide.
Supplies You Need for a Jelly Roll Rug
You do not need the most expensive supplies to make a beautiful rug.
Here’s what I recommend for beginners:
Quick Supply Links
To save you hunting around, here are the exact supplies I used:
This post contains affiliate links, which means I may earn a small commission at no extra cost to you.
1. Jelly Roll Fabric
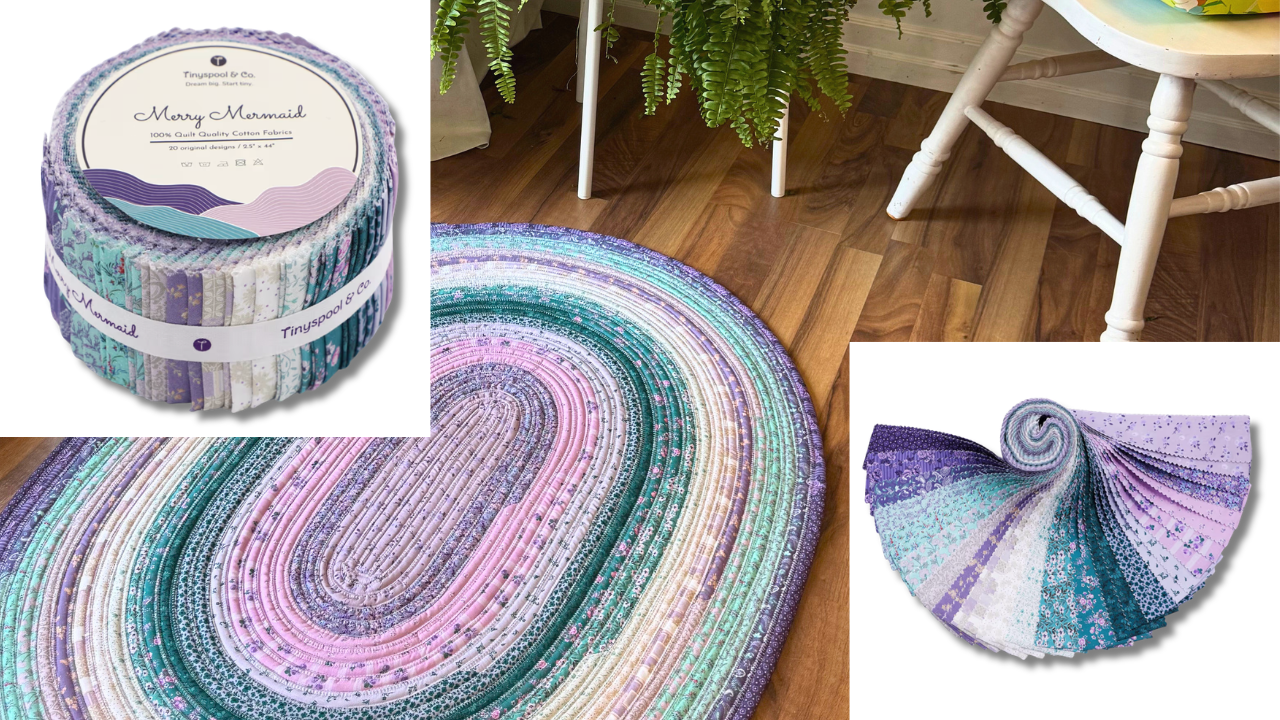
I used the Merry Mermaid jelly roll by Tiny Spool from Amazon because it’s affordable, pretty, and easy to get, making it a great beginner jelly roll fabric option.
You can also:
use any pre-cut jelly roll
cut your own fabric strips
If cutting your own fabric, cut strips 2.5 inches wide.
2. Batting
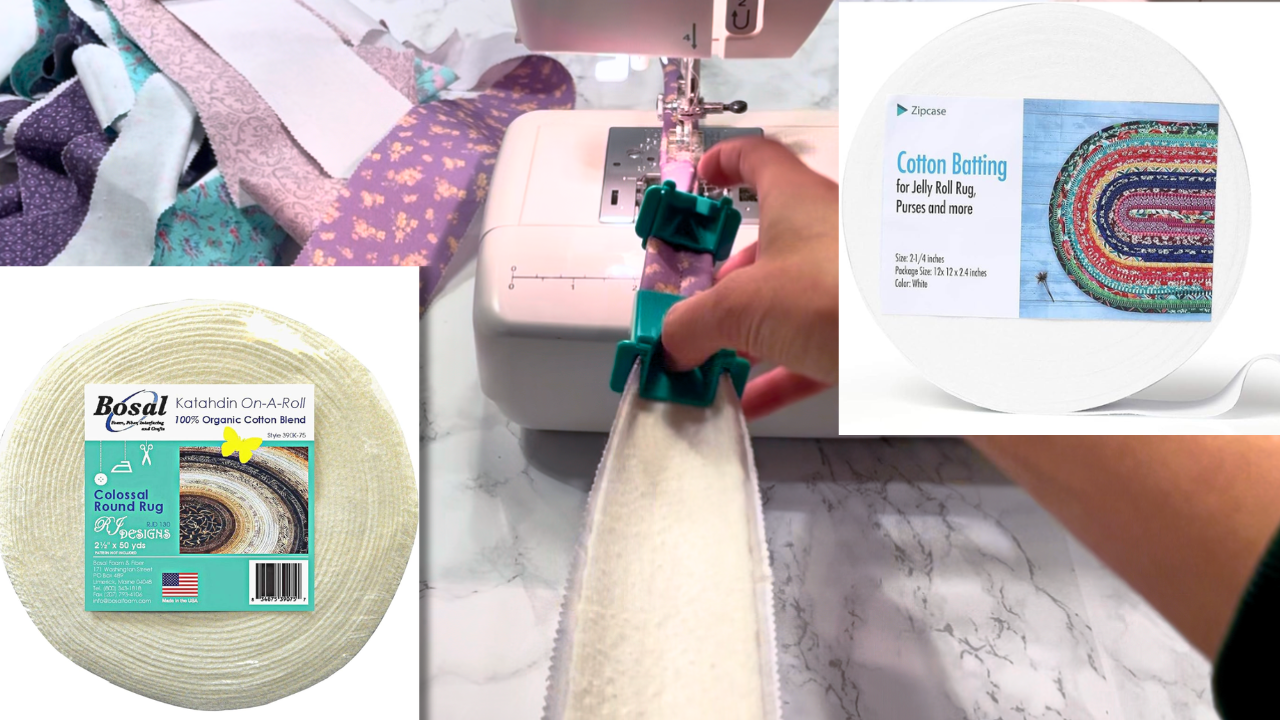
I recommend 2¼-inch pre-cut batting strips, especially for beginners.
Why?
Because they:
save time
reduce measuring
reduce frustration
You can also cut your own batting if needed.
** I personally prefer 2¼-inch batting inside 2½-inch fabric strips because it reduces bulk and makes folding easier. You can see in the picture above that the batting is just slightly smaller in width than the fabric.
Some people prefer the premium Bosal 2½ inch batting(shown bottom left), which gives the finished rug a nice thick fluffy look, but I find it bulkier and a bit harder to sew with, so I prefer the Zipcase 2¼-inch batting(shown top right) for a beginner. But either works!!!!
3. Clover Fabric Tube Maker (Highly Recommended)
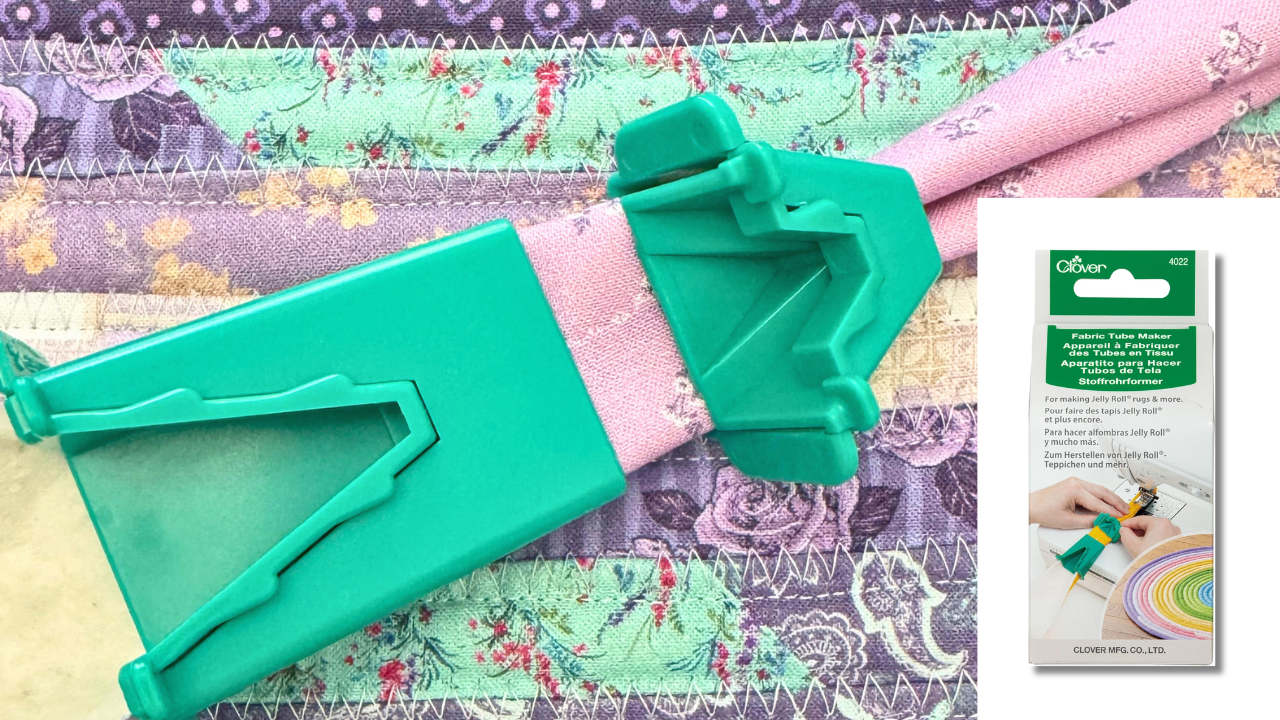
If I recommend only one extra tool, it’s this one.
The Clover fabric tube maker makes folding your jelly roll tube SO much easier.
Technically you can fold everything by hand and then iron it.
But honestly?
That adds a lot of time and frustration.
If you plan to make even one jelly roll rug, this tool is worth it. It will save you So. Much. Time.
4. Sewing Machine
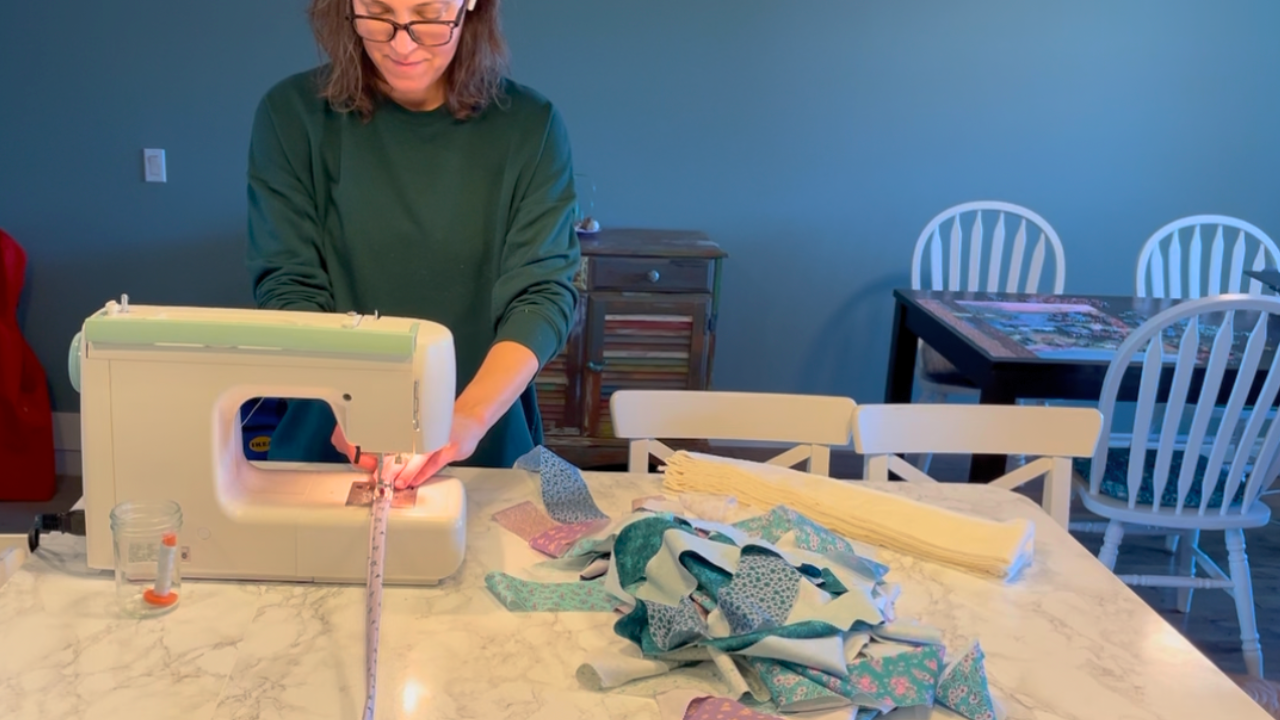
You only need a machine that can do:
straight stitch
zigzag stitch
That’s it.
No fancy machine required.
I sew on my old basic Kenmore, on my kitchen island, in the dark, after my kids are in bed. Nothing fancy or picture perfect.
5. New Needle + Neutral Thread
Use a fresh needle.
You’ll be sewing through many thick layers, so a dull needle can cause skipped stitches and frustration. I throw in a new universal needle with each rug (I’m a big believer of use what you have), but some people prefer using a denim needle.
A neutral gray or white thread is usually the safest choice because it blends with most fabrics.
Also, I’ve never used a walking foot, so don’t worry if you don’t have one. I just use the standard foot my machine came with. But some people do prefer them, so that’s an option if you find your machine struggling with the bulky sewing.
Now to the good part!
Step 1: Sew Your Jelly Roll Strips Together
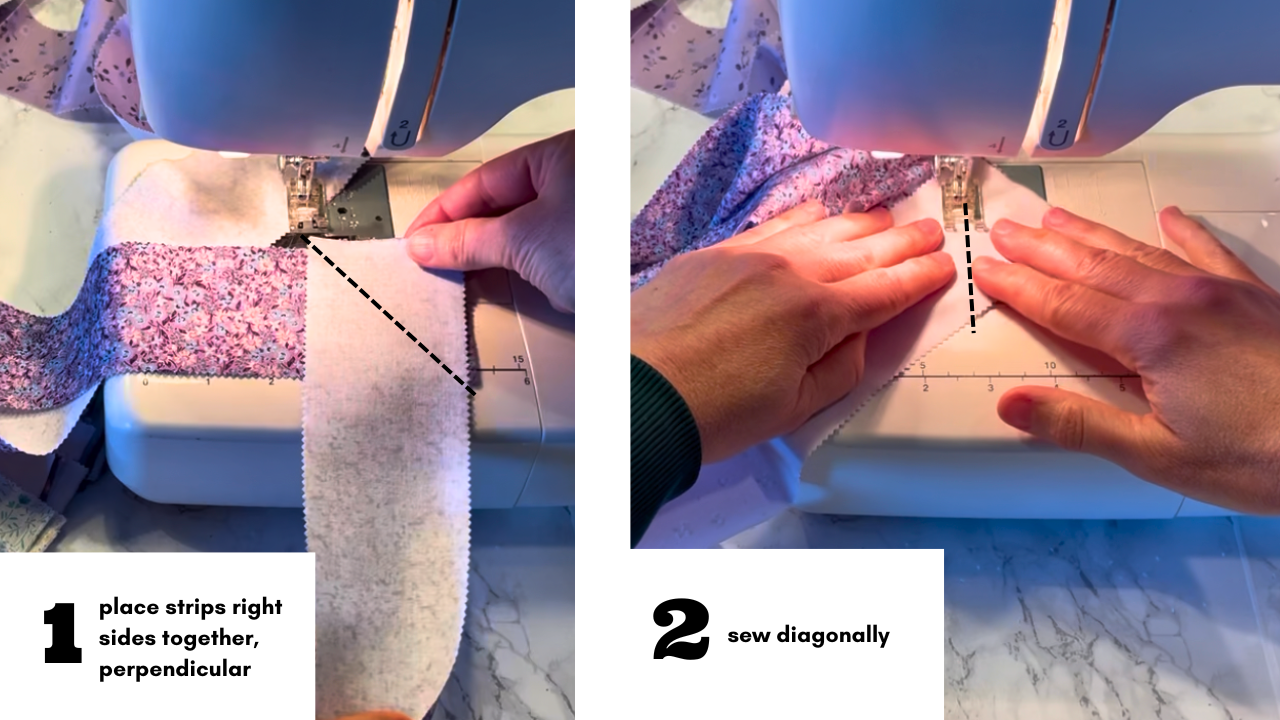
Take all your jelly roll strips and sew them together end to end.
I recommend sewing them diagonally rather than straight across.
Why diagonal seams?
They:
reduce bulk
look nicer
distribute seam thickness better
To do this:
place strips right sides together
position them perpendicular
sew diagonally across
Then trim off the excess triangle pieces.
(And save those scraps… I have another fun project planned for them!)
AND… I don’t iron the seams! If you are using the Clover Tool, there is no need to iron, as when they feed through the Clover Tool, the seams flatten perfectly, all on their own!
Step 2: Make the Fabric Tube
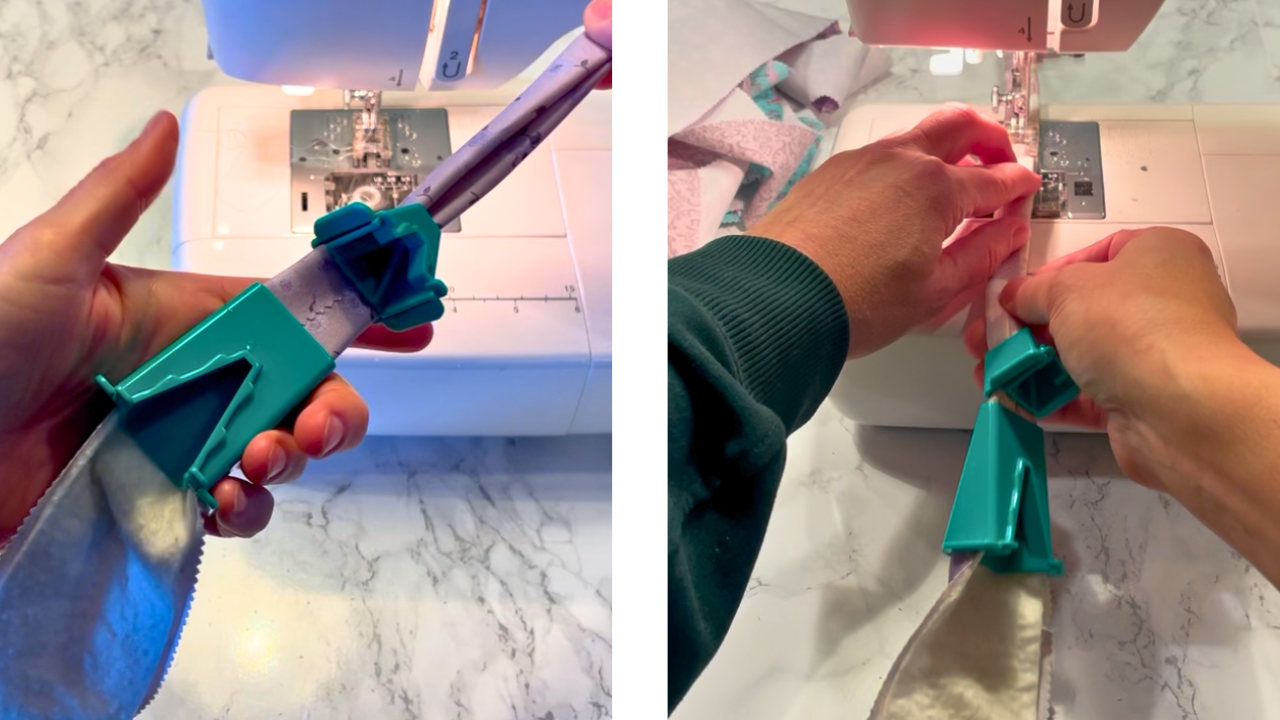
This step looks intimidating but becomes very easy once you start.
To build the tube:
Lay fabric right side down
Place batting on top
Feed through Clover tool (watch the video to see how easy it is!)
Sew closed
At the beginning of the tube, fold the raw edge inward so no frayed edges show.
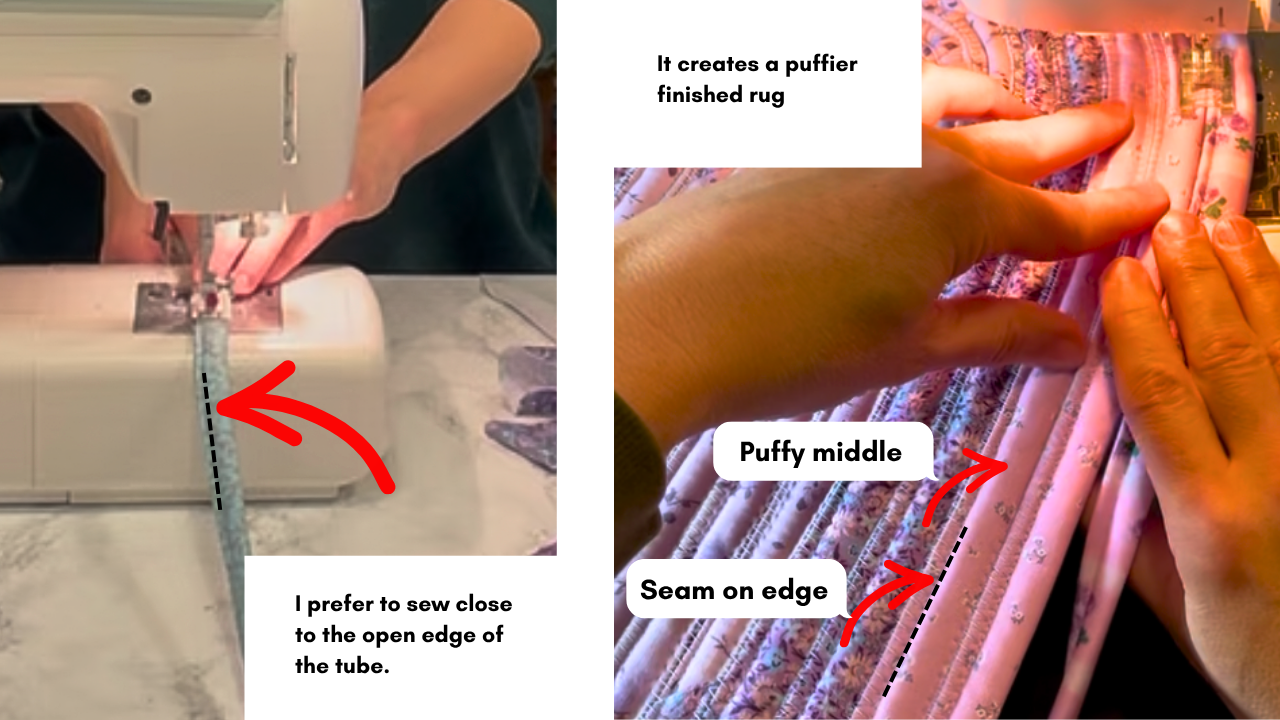
Then sew the tube closed using a straight stitch.
I like sewing closer to the open edge rather than directly in the center, because I prefer a puffier finished rug. See below.
Some people prefer to sew a straight stitch down the middle. Others love the serpentine stitch down the middle. Honestly, I would probably prefer the serpentine stitch too, but my machine doesn’t have it, and I can’t justify a new machine for a cool looking Jelly Roll Rug. lol.
But if you have some cool stitches, this where your individuality can shine! Whatever stitch you choose and wherever you place it, your rug will be beautiful!
This part does take a while.
I usually:
put on headphones
start an audiobook
get into sewing mode
It’s repetitive, but honestly very relaxing. As weird as this sounds, this might be my favorite part.
Then you will have a giant pile of one very long continuous tube.
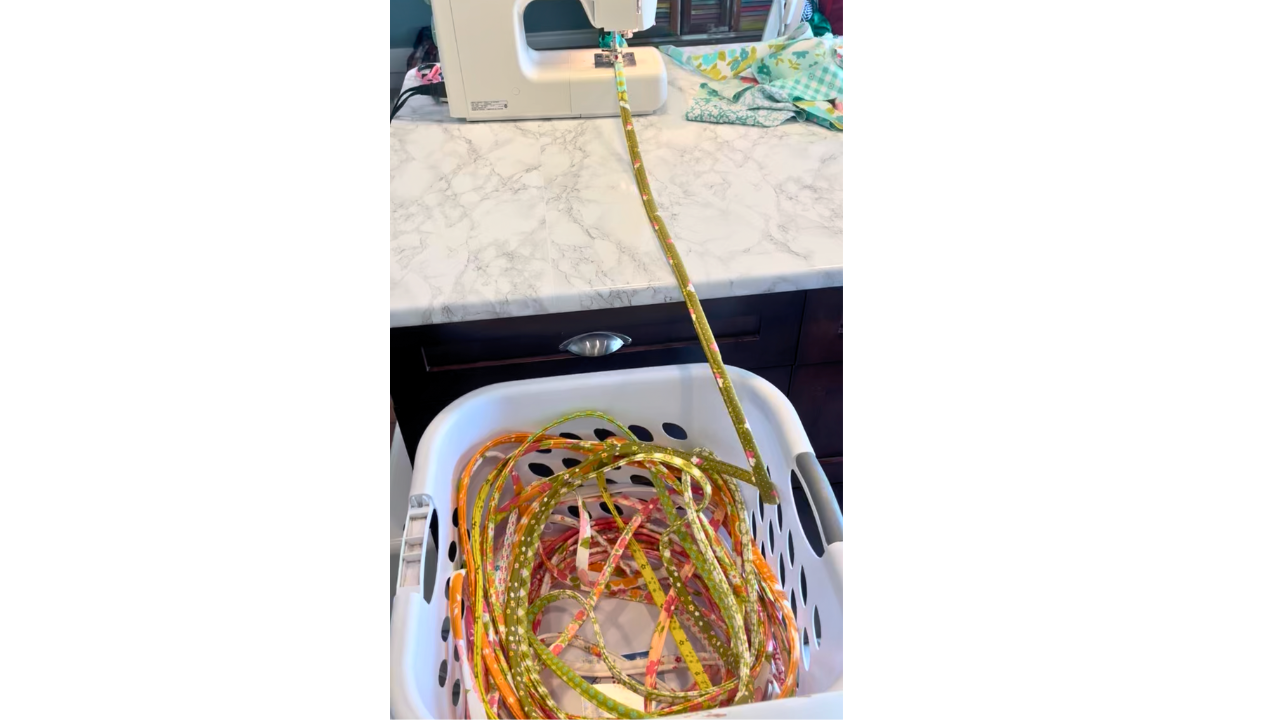
Some people roll the tube into a ball, but I just keep mine loose in a laundry basket and I’ve never had a tangle issue.
Step 3: Start the Rug
This is the part that scares most beginners.
And yes… this is where I was most intimidated too.
My biggest fears were:
getting ripples
making a bowl instead of a rug
messing up the starting fold
The good news?
Once you get through the first few rows, it gets MUCH easier.
I wanted my rug to be an rounded oval, so I started with a length of 10 inches. A longer start length will give you a more oval shaped rug, a shorter start length will give you a more rounder shaped rug.
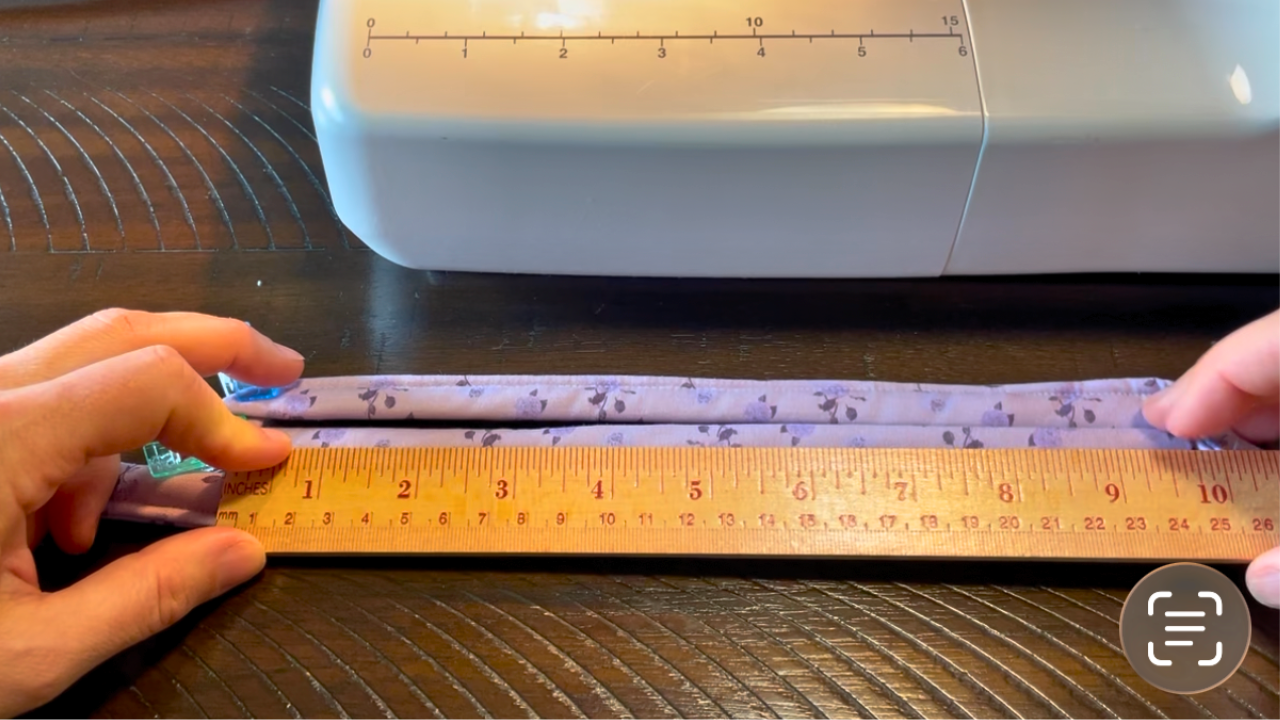
For beginners, I recommend just folding the tube once, sewing down the middle, and then scrunch around the corners.
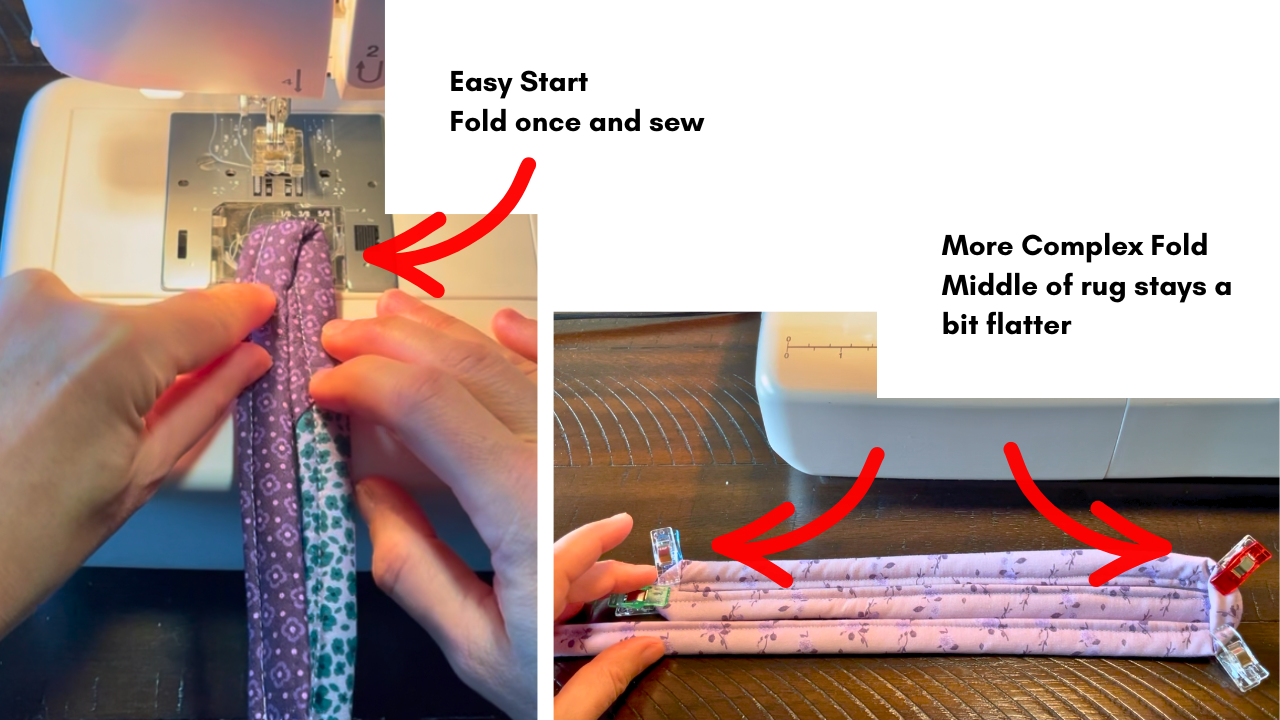
This is how I start most of my rugs and honestly find it the easiest (right picture - fold once and sew, scrunching around the second corner).
There is a more complicated fold method (pic on left) that can give a flatter start (original pattern by RJ designs), where you fold the first and second corners, and then scrunch around the rest of the corners.
If you just want to get going, give the “one” fold method a try!
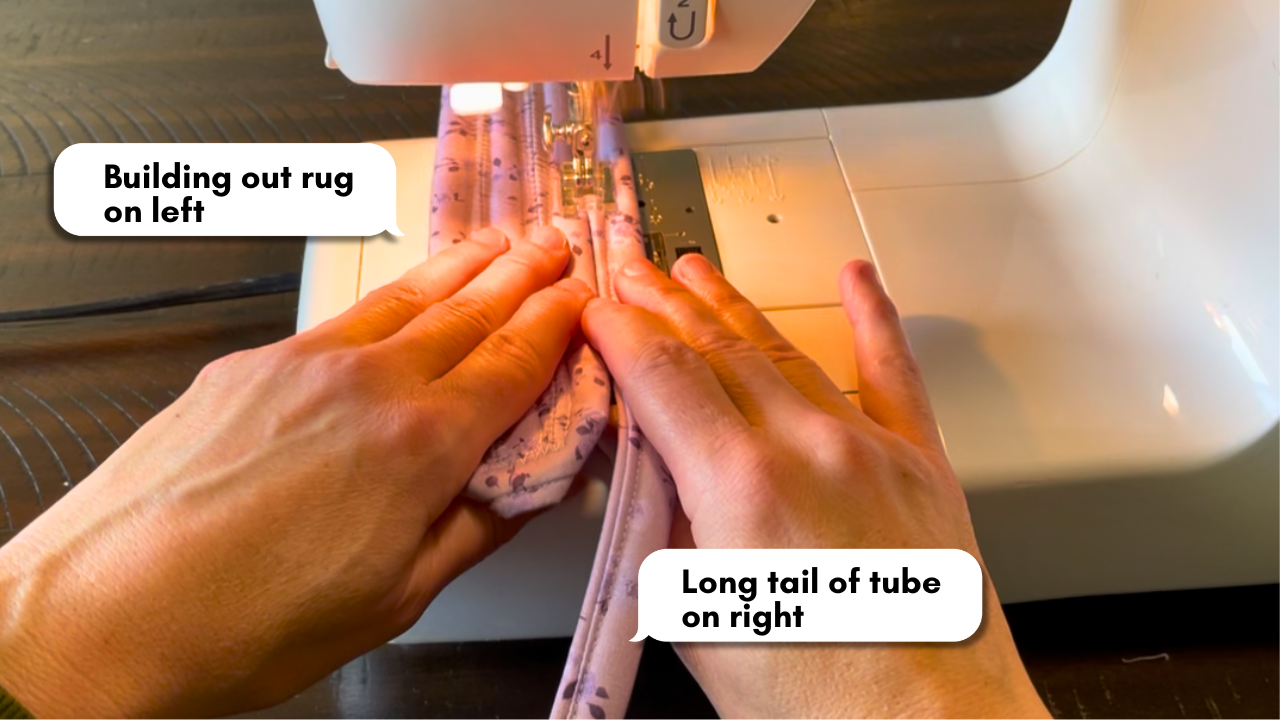
**PRO TIP: Make sure you are feeding the long tube in from the right, and the rug is being built to the left of your machine. Otherwise the rug won’t fit under the throat space of your machine.
How to Prevent Ripples in a Jelly Roll Rug
This is the big question.
If your rug is rippling or waving, here are my two biggest tips:
Tip 1: Keep Your Work Surface Flat
Your rug needs support.
If it hangs off your machine table, gravity can pull things out of alignment.
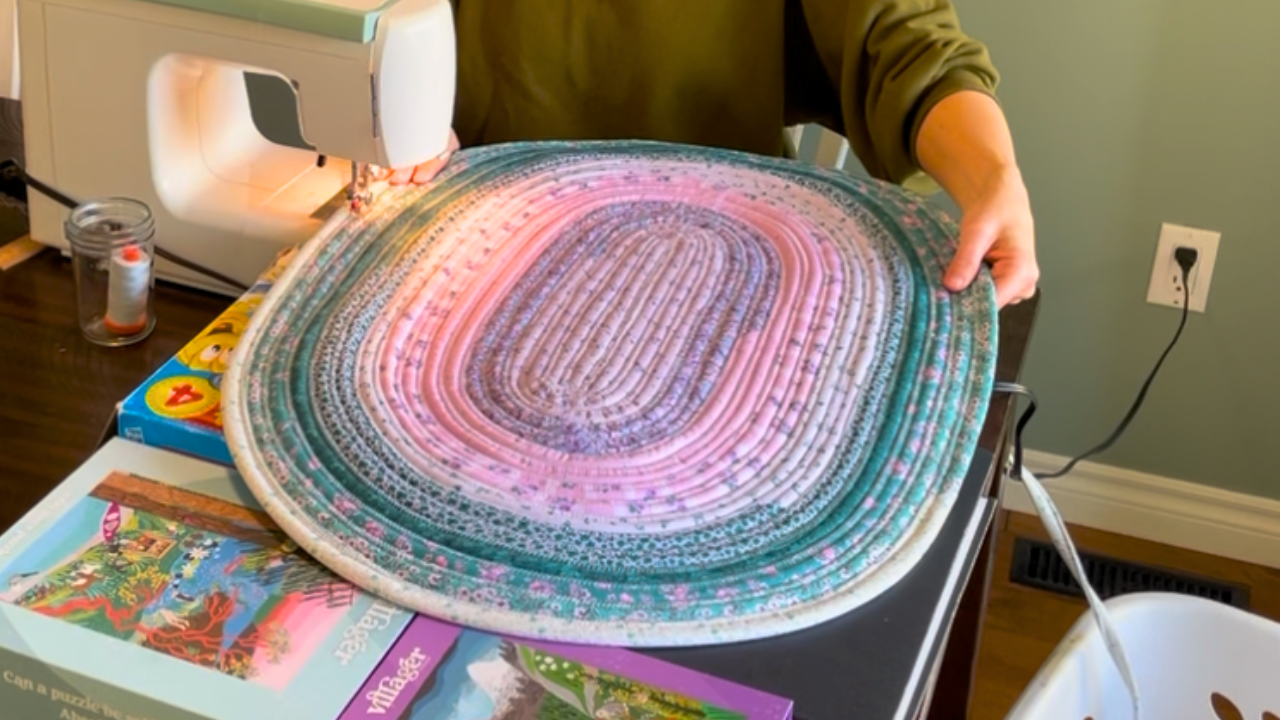
My machine has a tiny sewing area, so I literally use random things like:
game boxes
photo albums
books
Whatever keeps the rug level.
Pretty? No.
Effective? Yes.
Tip 2: Let the Machine Feed Naturally
This is HUGE.
Do not push or pull the fabric.
Just guide it.
If the outer tube feeds faster or slower than the inner tube, ripples happen.
Instead:
keep gentle hands
guide straight
let the machine do the work
** PRO TIP: This is where some people find a walking foot works better for them. If you’re keeping your rug as flat as possible while sewing it, and still getting waves, then it’s probably a tube-tension issue of either feeding the tube in too fast or too slow, OR the heavy rug dragging on the surface. You might find that a walking foot helps with feeding both the rug and the tube evenly.
What If My Rug Starts Curling?
If the inner edge curls upward, you may end up making a bowl instead of a rug.
To fix this:
slow down
flatten the inner edge of the rug with your fingers
keep the rug parallel to the table
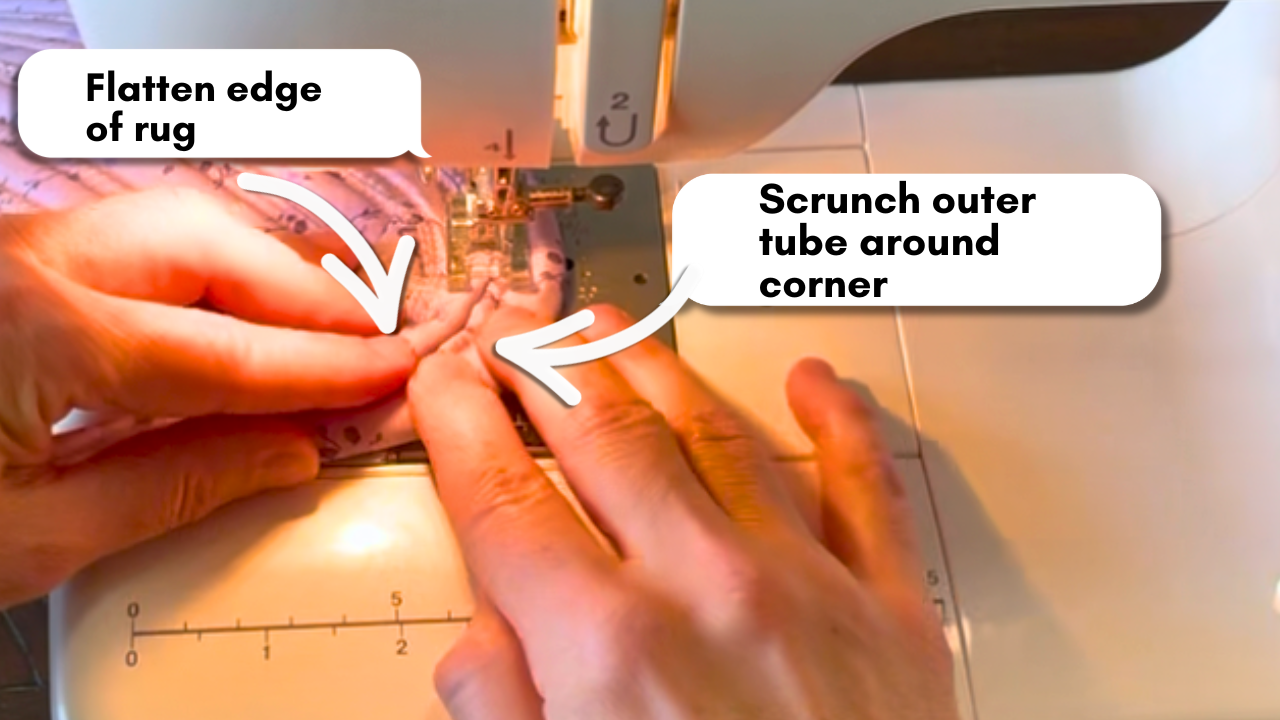
I don’t iron anymore because I found it:
took too long
flattened the batting permanently
Instead, I simply use my fingers to press things flat as I sew.
Final Thoughts: Your First Rug Doesn’t Need to Be Perfect
Here’s what I wish more beginners knew:
Your first jelly roll rug does not need to be perfect.
You don’t need:
the perfect technique to start
expensive tools
fancy stitches
designer fabric
You just need to start.
And once you finish one…
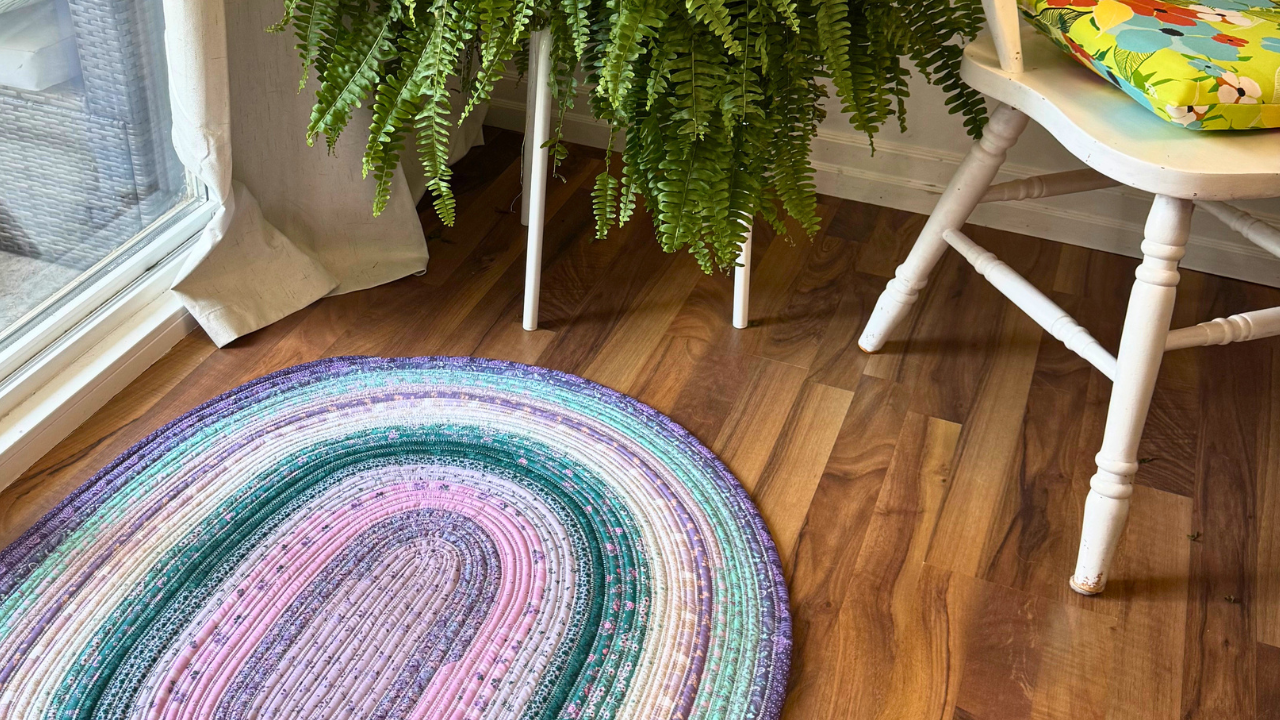
Be warned: jelly roll rugs are addictive!
You may suddenly find yourself wondering where to put all of them.
Supplies I Used
I only share products I actually use in my own sewing room. If something frustrates me, I’ll tell you that too!
These are affiliate links. If you purchase through these links, I may earn a small commission at no extra cost to you. I only recommend tools and supplies I personally use and love.
Related Tutorials
If you’re still deciding which rug shape to make, check out my comparison of Rectangle vs Oval Jelly Roll Rugs.
Not sure whether Amazon jelly rolls are worth it? I tested both in Amazon vs Designer Jelly Roll comparison.
Can You Use Flannel Instead of Batting in a Jelly Roll Rug?
I tested it using scrap flannel and share what worked, what didn't, and what I'd do differently.
And if you’re making your first rug, leave a comment below, I’d love to cheer you on!